
Often, the first challenge in solving a problem is understanding it. Sometimes this is pretty simple, 'My computer won't start'. But most of the times problems are a little more complex, especially anything that is software related. It is not uncommon for a problem to arise after following a predetermined set of steps. In fact this is often the second step in problem solving: reproducing. It is much easier to resolve a problem that can be reproduced than something more transitory. Unfortunately, documenting the steps can be a hit or miss proposition, especially for less savvy end users. But I have a solution.
Windows 7 includes a little publicized feature that can be a great assistance in resolving problems; especially when you can't see the problem first hand. The Problem Steps Recorder allows a user to walk through the steps to recreate a problem and create a screen capture complete with annotations. Everything is stored in an MHTML file that you can step through. The end result is that you can see what the user sees and have a visual record of their problem and steps to reproduce it.
The Problem Steps Recorder (PSR) does not capture video like Camtasia so the end result is a manageable file that can be emailed to the help desk. Instead, the PSR tracks mouse and keyboard activities in relation to the desktop and any Windows that are opened or closed. The PSR's view is the user's desktop. It is not isolated to a single application.
As the user steps through their problem, the PSR will periodically take a screen capture. This usually happens when some event occurs such as clicking a menu, opening a window or moving the mouse. The screen capture will also highlight the event by enclosing the appropriate Window element in a green box. A snapshot will also be taken whenever the user wishes to add an annotation. I'll cover that a little bit later.
First, you might need to make sure the PSR is enabled. It should be by default. But you can modify the registry directly on each computer to ensure it is enabled, or disable if you prefer. The key you are looking for is:
HKEY_LOCAL_MACHINE\SOFTWARE\Policies\Microsoft\Windows\AppCompat
To enable the PSR, set the DisableUAR entry, which is a DWORD, to 0. To disable, set the value to 1.
The better approach is to use a Group Policy. Navigate to Computer ' Policies ' Administrative Templates ' Windows Components ' Application Compatibility. Find the setting 'Turn Off Problem Steps Recorder'

Figure 1 ' Enabling Problem Steps Recorder in GPMC
Open the entry. Before you madly click away take a moment to carefully read. This is one of the notorious (in my opinion) 'opposite' policies. If you enable this policy, then the PSR will NOT be available. You could leave it un-configured, or disable the policy if you always want the PSR to be available. Apply the policy to your computers. This setting only applies to Windows 7 and Windows Server 2008 R2.
Now for the user and I encourage you to walk through the process yourself. The first challenge is finding the program.. Good luck. For whatever reason, there is no icon or shortcut that I can find in the Start Menu. To launch the program, type PSR in the Search programs box and press Enter.

Figure2 ' The Problem Steps Recorder
You can click on the question mark icon to launch help. Normally the PSR will prompt the user for a file name upon completing the reordering. However, you can define the name ahead of time by clicking on the down triangle just to the right of the help icon and clicking on Settings. In the Output location, type the path and filename. You must specify a zip file like \\Server01\Helpdesk\Hicks-PSR.zip. In fact, if you can get your users to save files to a network share, properly secured of course, you can speed up the troubleshooting process. If your help desk software supports attachments it only seems natural to add the zip file to the documentation.
After the user completes the recording, they can return to this menu and use the Send to Email Recipient option. This will launch the default mail client and automatically attach the zip file. All the user has to do is enter an email address. I wish there were ways to automate some of this, but I can't find any way that doesn't resort to a kludgy send keys type of script.
So the user has the PSR launched and is ready to record. Click Start Record. From this point forward everything the user does will be recorded. When a menu or icon is clicked, a screen shot is taken along with a short summary.
To get the most out of this you want to educate your users to take advantage of the annotation feature. At any point in the recording, especially when the problem is created, the user should click Add Comment which will display the dialog box like Figure 3.
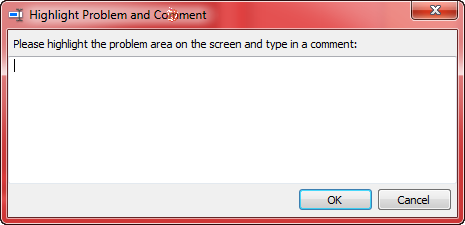
Figure 3 ' Adding a comment in the Problem Steps Recorder
The screen will also be dimmed and the cursor will change to a crosshair. The user is encouraged to click and drag over the part of the screen that they are commenting on. When you view the final file, you will see the highlighted area. This is a must for cluttered desktops.
It is not unreasonable to expect that during the course of recording a problem, sensitive information such as data or password prompts will be displayed on the screen and potentially captured. Assuming that the problem isn't with this type of information, the user can click the Pause Record button on the PSR at any time. This will temporarily suspend all recording while the user does whatever needs to be done confidentially. The recording timer is also suspended so when you review the finished file you'll have no indication that there was a pause, except for changes in window position. When ready, the user clicks Resume Record and finishes recording the problem.
When the problem is reached, I would encourage the user to add a comment and highlight the problem area. Click Stop Record. Assuming the user didn't setup a file name in Settings ahead of time, they will be prompted for a filename. The file is stored as a zip file and should contain a single .mht file.
It would have been nice to offer an option to password protect the zip file. If security is of high concern, you may need to work out a process for the user to repackage the file in a password protected zip file. Otherwise, the user can copy the file to a network share, transfer via n IM client or email to the help desk. The user can use the send email link I mentioned earlier. If you use this option, the PSR will attach the original zip file so if you add any steps to modify the zip you might want to maintain the original name.
Once you get the file, open the archive and double click the .mht file. Iit will most likely open in Internet Explorer. You may get a warning so click OK to allow blocked content
Viewing the file you'll see the first screen shot under problem steps The PSR records a time stamp and the Windows event such as mouse click.. You can either scroll down the page or use the Next shortcut to jump to the next step. I also like that you can view the recorded steps as a slide show
Critical events, or those that initiated the screen capture, are highlighted in a green box. This will also be true of any user highlights as well. If the picture is a little hard to view, click on it to open up the full size screen capture. Internet Explorer should even let you magnify to zoom in. If you wish to save the image, use Internet Explorer's Save As feature.
At the very end of the report will be an Additional Details section. This should be a summary of the screen capture events plus whatever other information the PSR felt was relevant such as the operating system. Another omission in my opinion is not capturing basic information like the computername. The .mht file is named with a time stamp, but that doesn't help much. I would recommend that you instruct users to save their report with a naming standard that includes this information; something like PSR-Username-Computername.zip.
As an alternative, or perhaps in addition, you could ask your users to add an annotation at the very end with their username, computer name, phone number or any other relevant information.. That way, if someone is reviewing the problem recording they have all the relevant contact information at hand without having to dive back into the help desk system.
The PSR is a terrific addition to the help desk toolbox, You get the benefit of a detailed visual record but without the overhead of a true video recording. But I would encourage you to take this a step further. Even though the tool is advertised as a Problem Steps Recorder, it records anything.
You could build an entire library of recordings for everything such as how to fix common problems to tutorials on how to do a mail merge in Microsoft Word. As you go through the steps, add plenty of comments. Here is a link to an MHT file I quickly put together on how to create a remote assistance invitation; something an end user might want help in doing. NOTE: I've included the MHT file here. You could store these files on a network share, or if you have the necessary expertise convert them into pages that can be delivered from an intranet server. At the very least, you can go through the final recording and save off only the key screen shots and annotations. I find using the PSR much faster than walking through a process and manually taking screen shots at key moments. The PSR does it all for you.
Be aware that by default the PSR only captures 25 screen shots. If you, or the end user, think they'll need more then you should increase this value under Settings. I wish there was a way to globally and permanently modify this value but there doesn't seem to be.
Before we wrap up, let me point out that even after everything I've discussed and the benefits of having a screen capture, there may be situations where the user can't or won't share their screen. In these situations pausing the capture isn't even an option. Should you or the end user need this, under Settings there is an option to enable or disable screen capture. Click enable screen capture No..
As the user steps through their problem, mouse and keyboard actions are recorded but there will be no screen captures. UNLESS, the user adds a comment. This result in the same grayed screen capture you get when running the PSR normally, but information could still be visible so beware.
Finally, even though we've been looking at this from a Windows 7 end user experience, the Problem Steps Recorder is also supported on Windows Server 2008 R2, except for Server Core. You run it the exact same way. So if you are first level server support, you can record the problem and send the file to the next level. Or record a series of server administration processes which can do double duty as training material and documentation.
The Problem Steps Recorder isn't perfect, but it's free and on every Windows 7 desktop in your organization. The hardest part is getting it started and integrated into your help desk. Good luck!

Comments